JSON API User Plus WordPress Plugin version 4.0.0 has added the feature for your website users to sign in using their Apple ID. you can easily add “Sign in with Apple” button with few clicks after providing Apple API credentials. In addition to website social login, there are two REST API endpoints available for you mobile app integration if you are using WordPress as backend for your mobile data via REST API.
What will Plugin add on website?
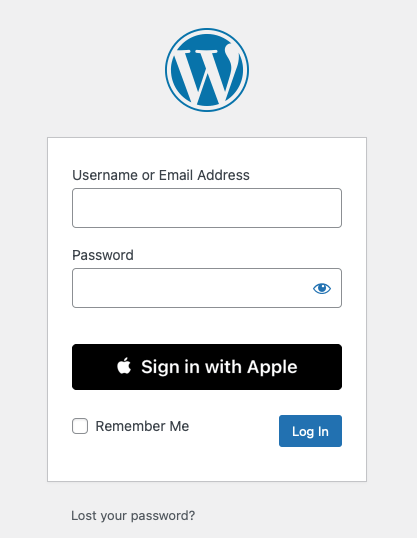
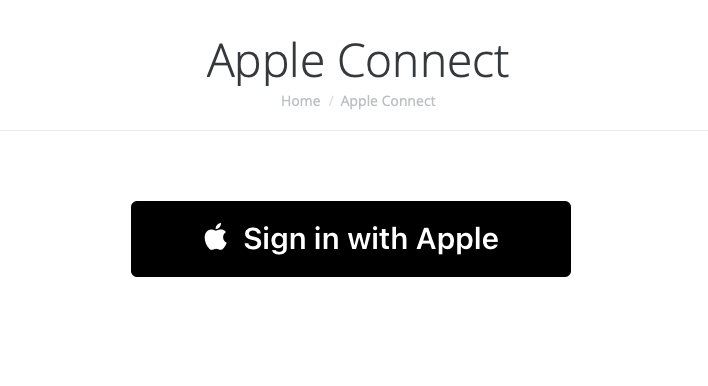
JSON API User Plus wIll add following Sign in Button on WordPress Login page for SSO sign in and user registration.
It will also provide shortcode for Button to add anywhere in yout posts, pages or widgets.
JSON API User Plus Plugin Admin Panel Settings
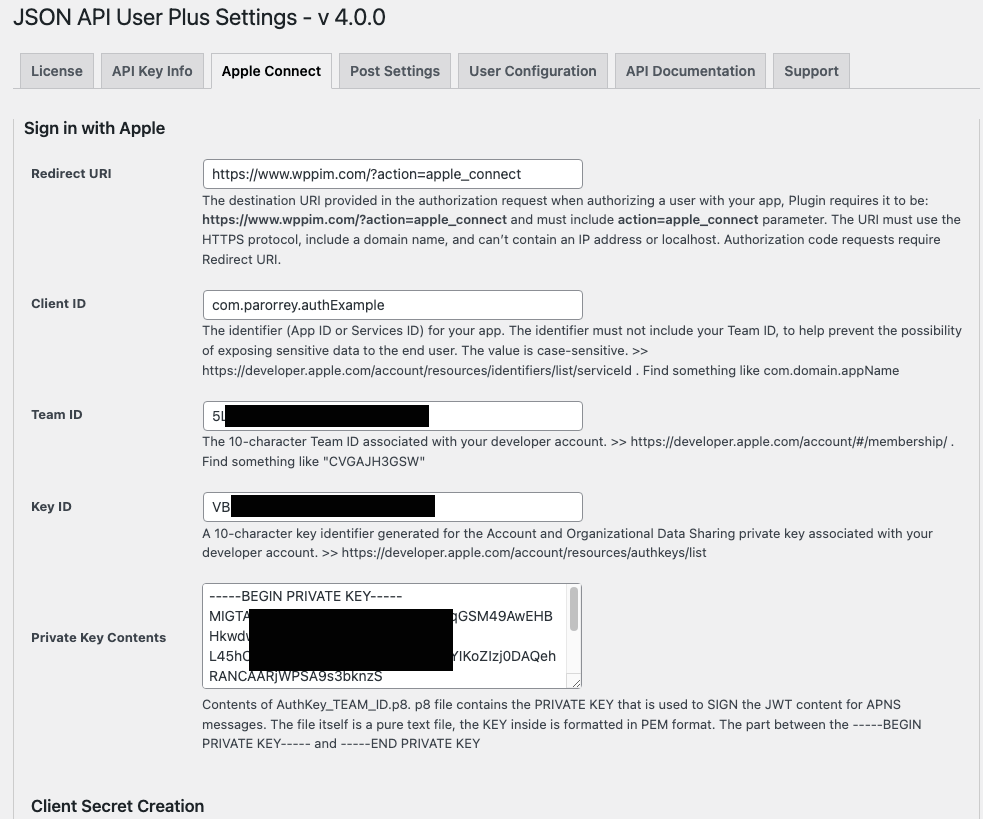
Here are the User Plus WordPress Plugin Settings screen where you can add your Apple Connect credentials.
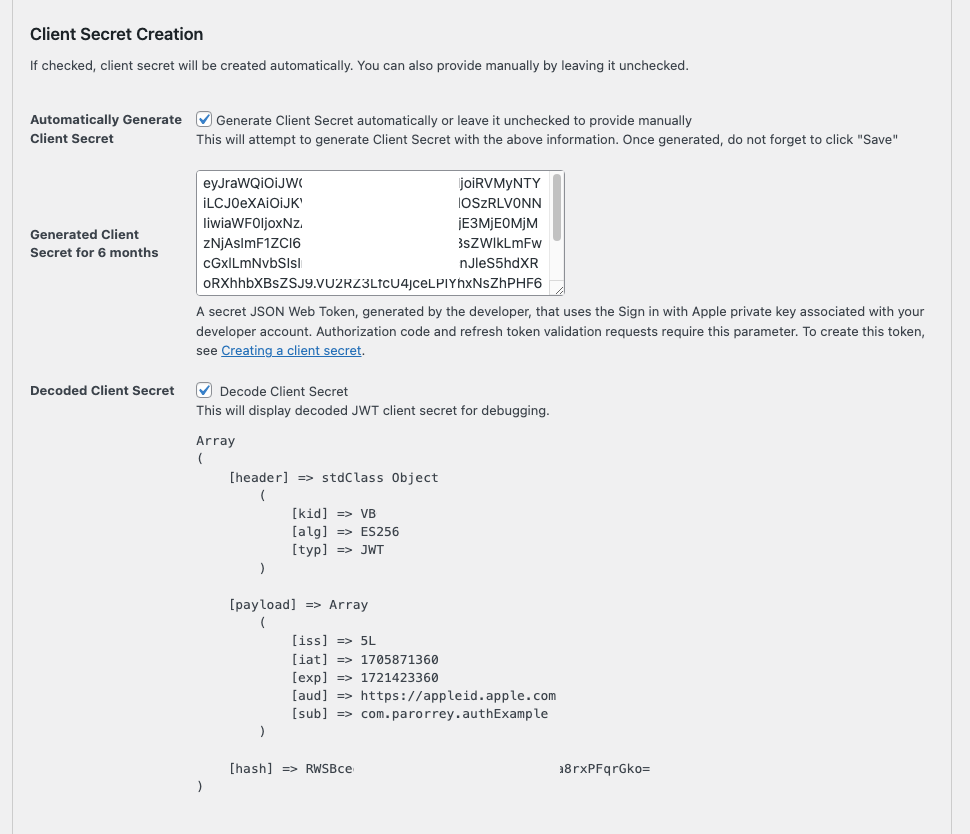
Apple REST API Client Secret Creation
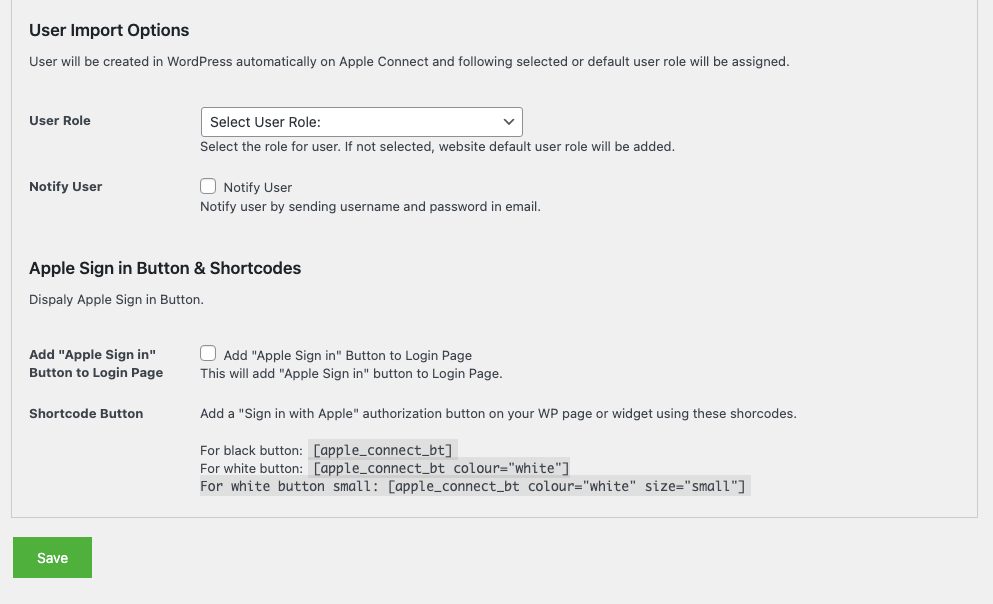
If checked, client secret will be created automatically. You can also provide manually by leaving it unchecked. You can also add a “Sign in with Apple” authorization button on your WP page or widget using available shortcodes.
WordPress User Import Options
User will be created in WordPress automatically on Apple Sign in and following selected or default user role will be assigned.
Steps to Configure Login with Apple for WordPress Websites – Apple Sign in Social Login (Apple SSO)
WordPress integration of Apple Social Login ( Apple SSO ) using OAuth 2.0 Protocol.
Login to Apple Developer Account
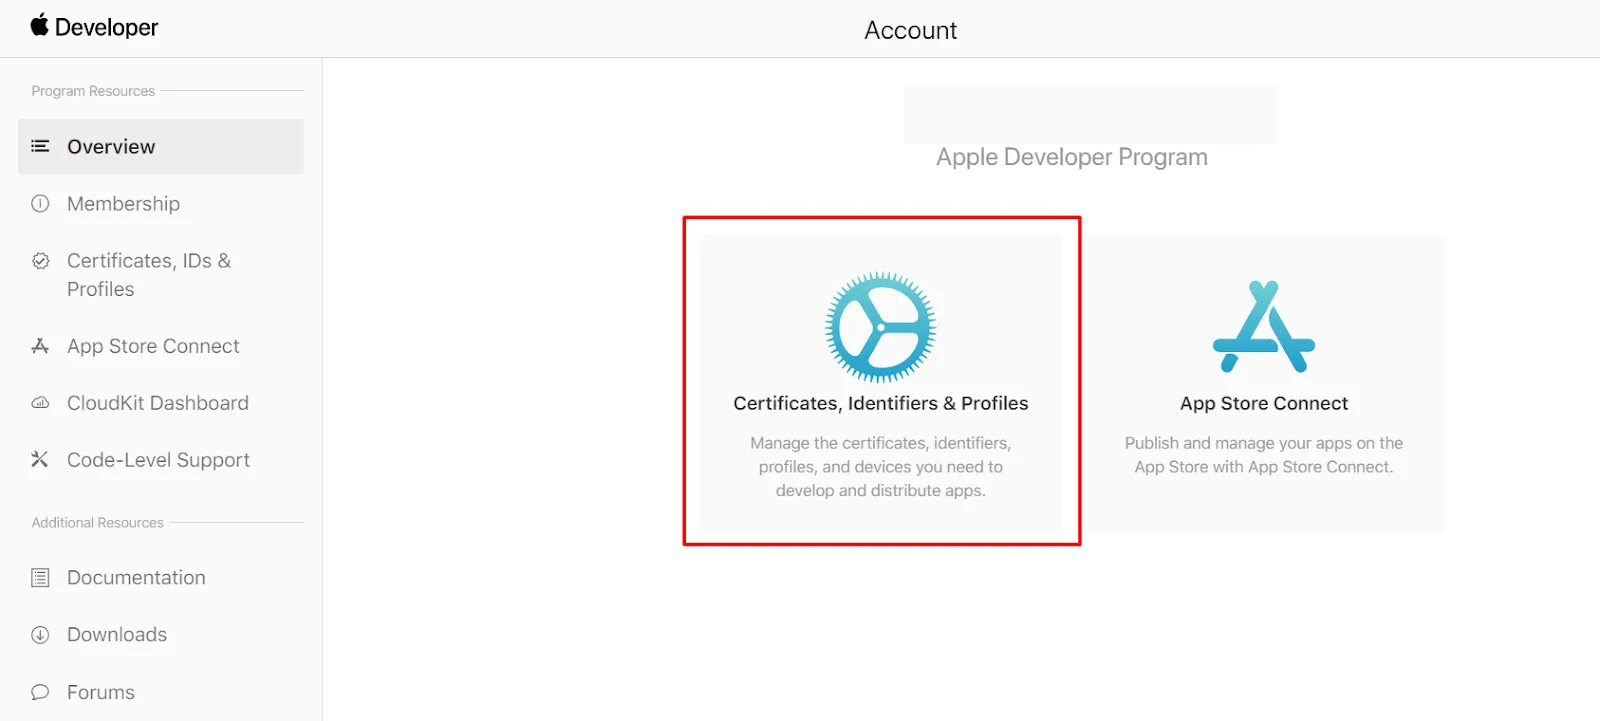
Go to https://developer.apple.com click on Account and Login with Apple developer account and Login to your developer account.
Go to Identifiers Link
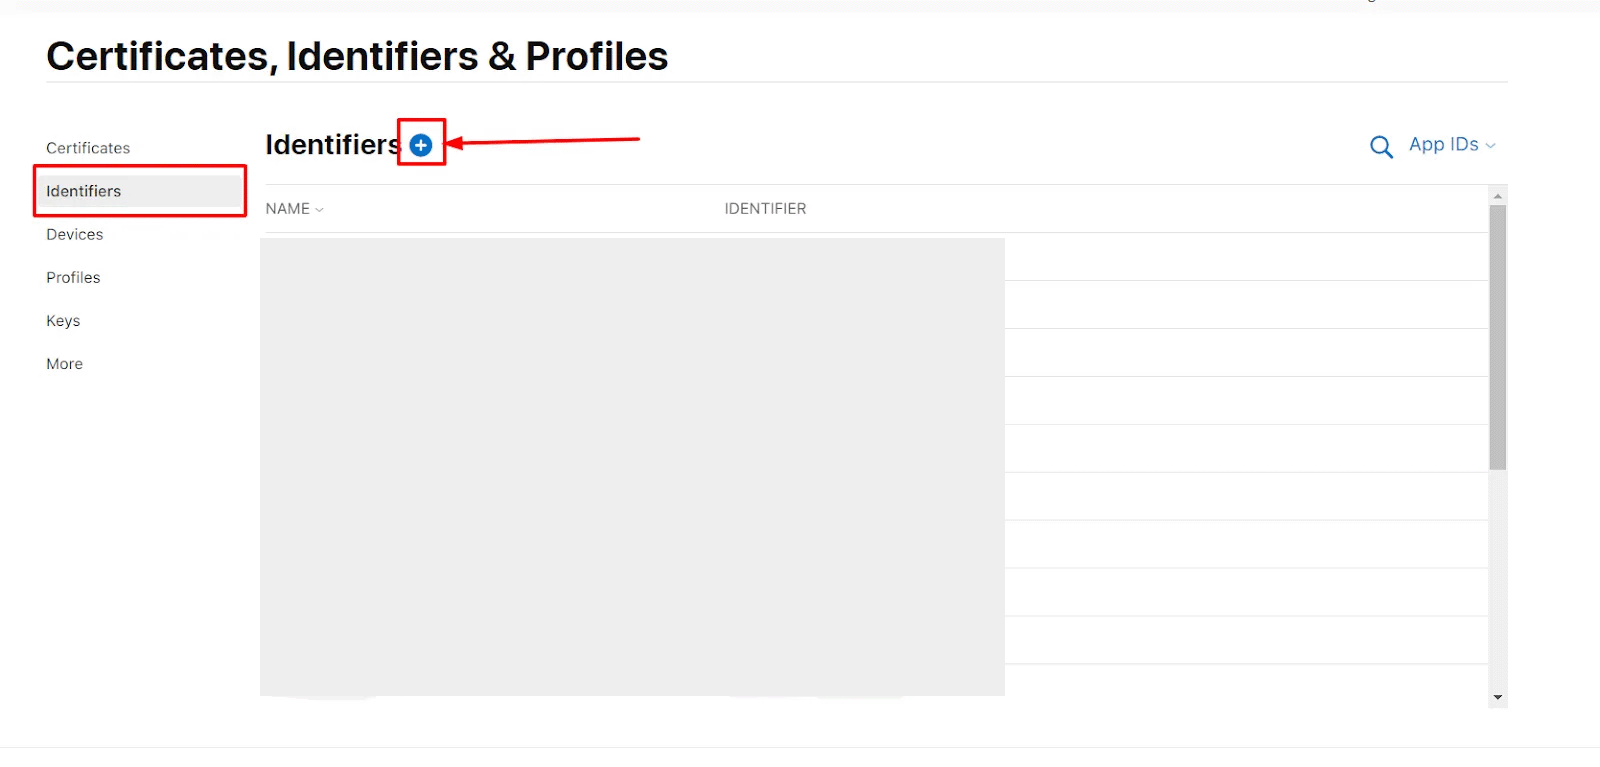
Then click on “Continue” for the next 2 screens of Apple Account.
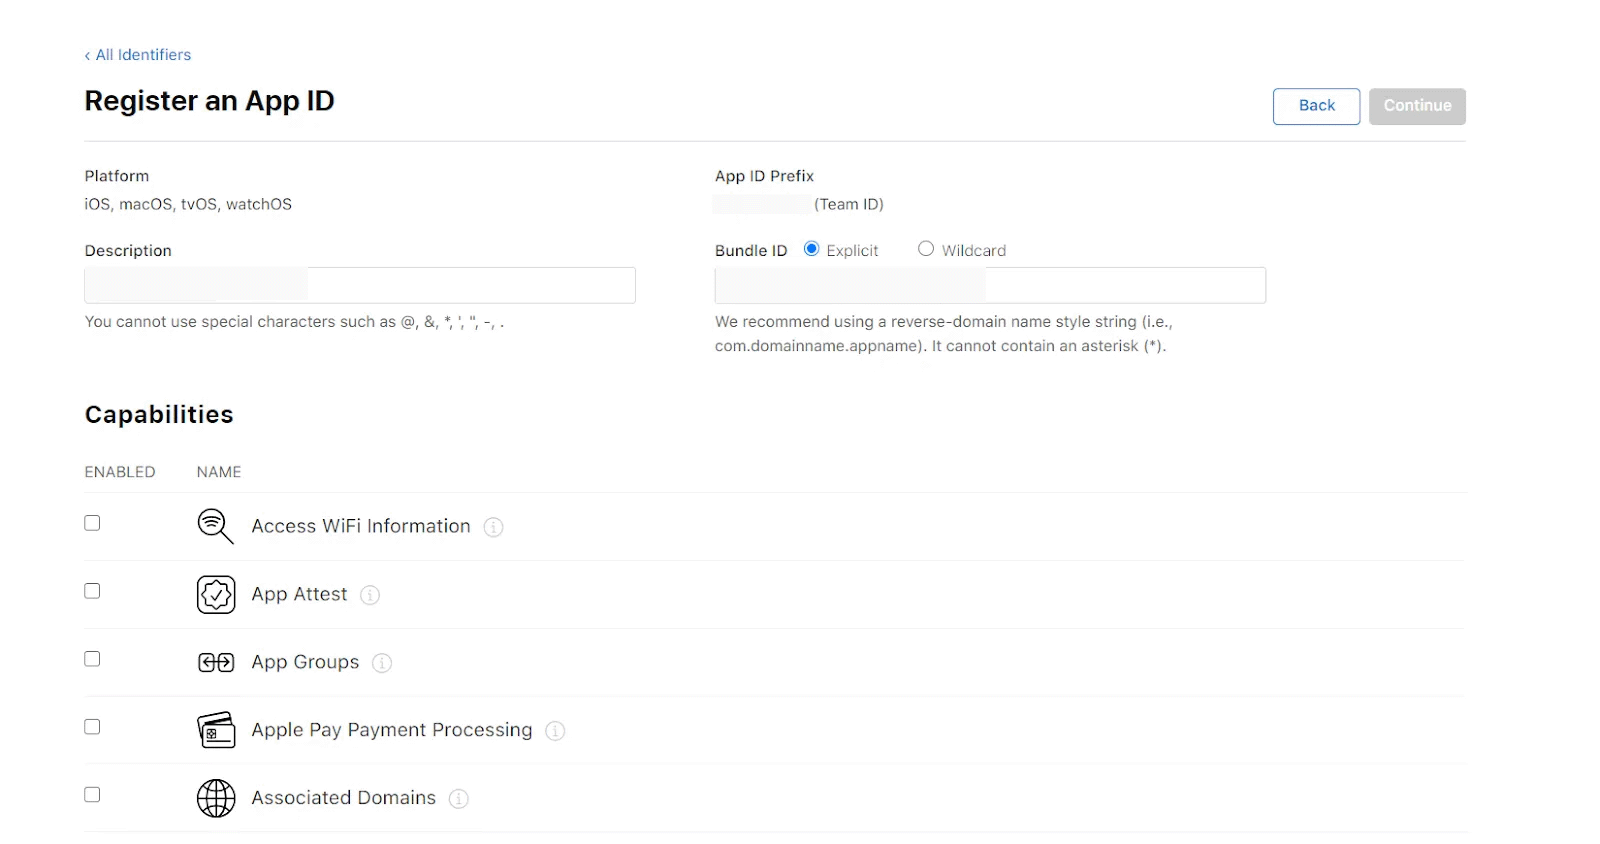
Register an App ID
Enter Description and Bundle ID for the App ID. (The Bundle ID is best when it’s a reverse-dns style string such as com.domain.AppName.)
Select the Capability
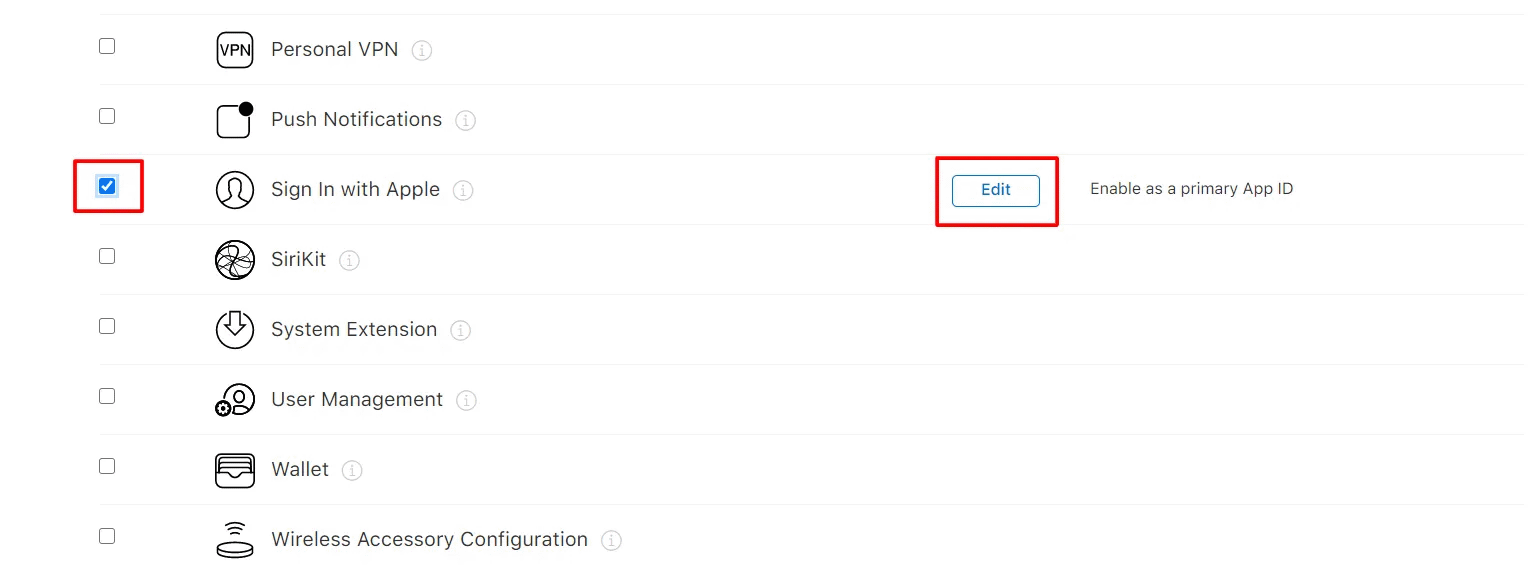
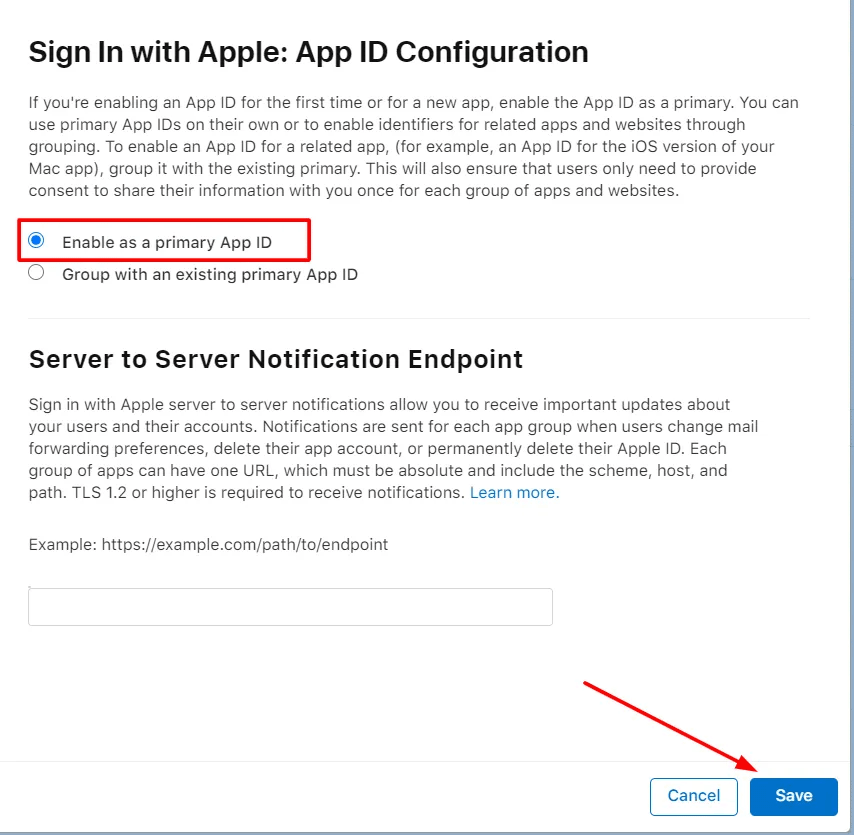
Sign In with Apple – App ID Configuration
Click on Continue and after that Register button.
Select Services IDs
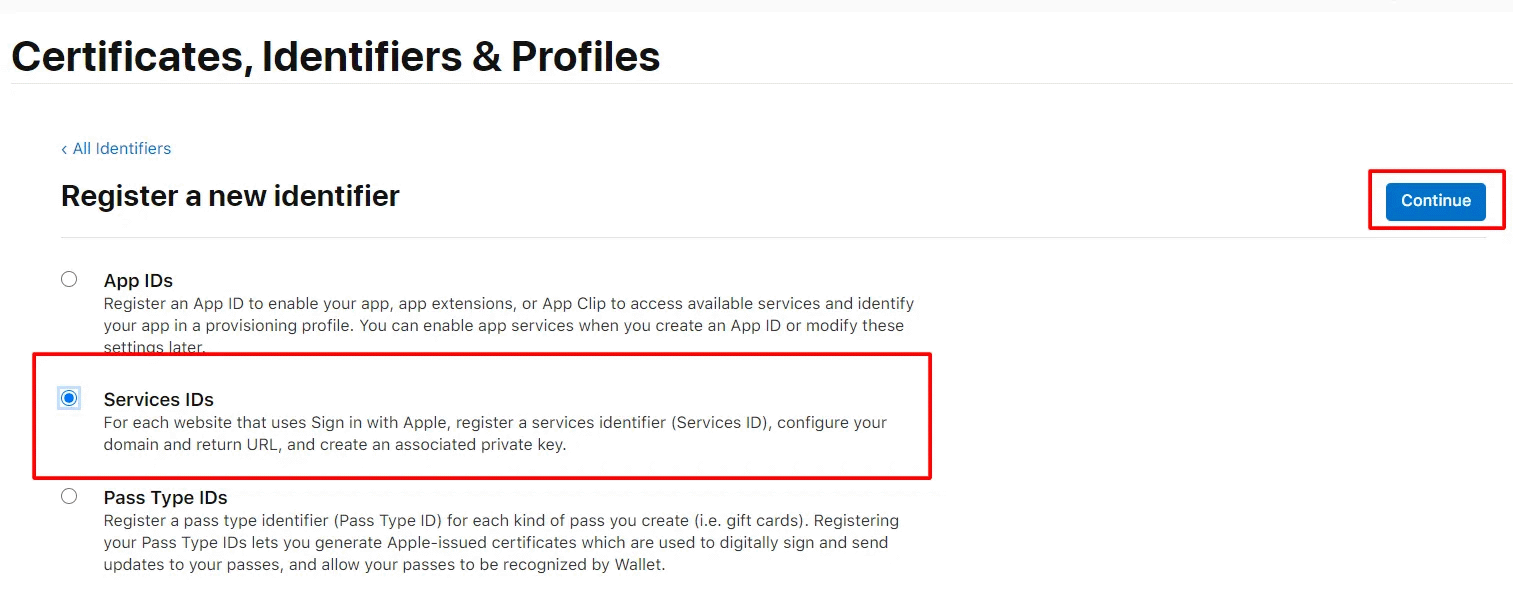
Create the Client ID

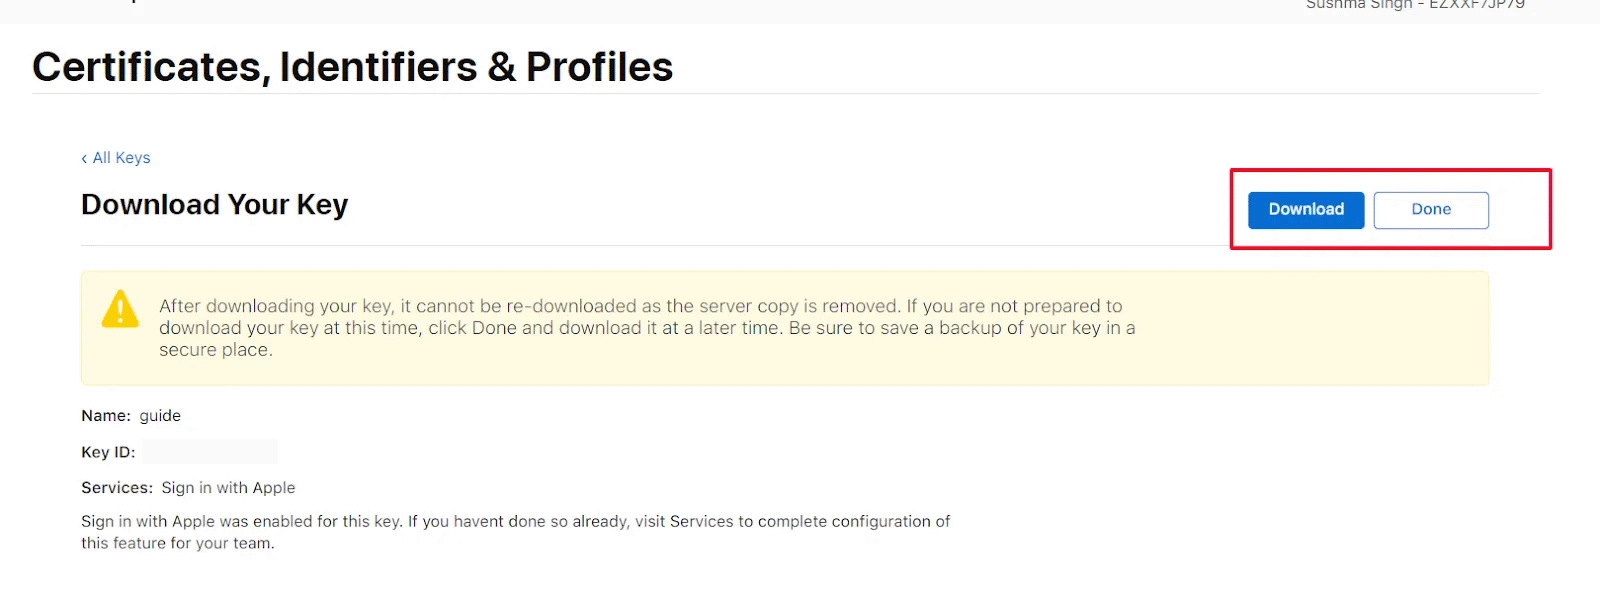
Register a New Key
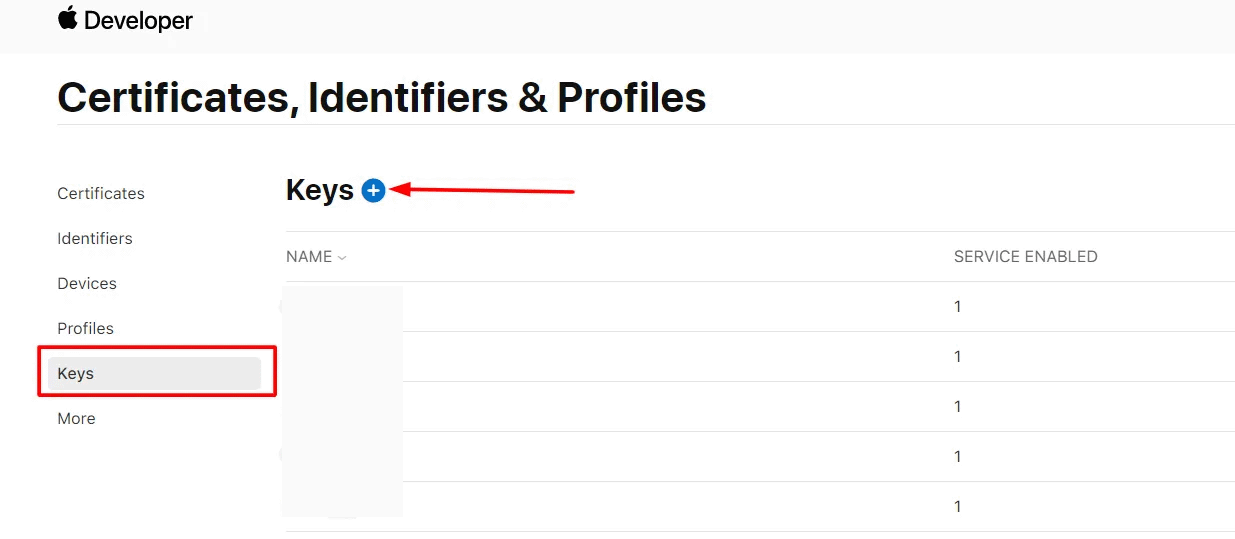
Next, click Keys from the left menu. Click on the Plus icon to register a new key.
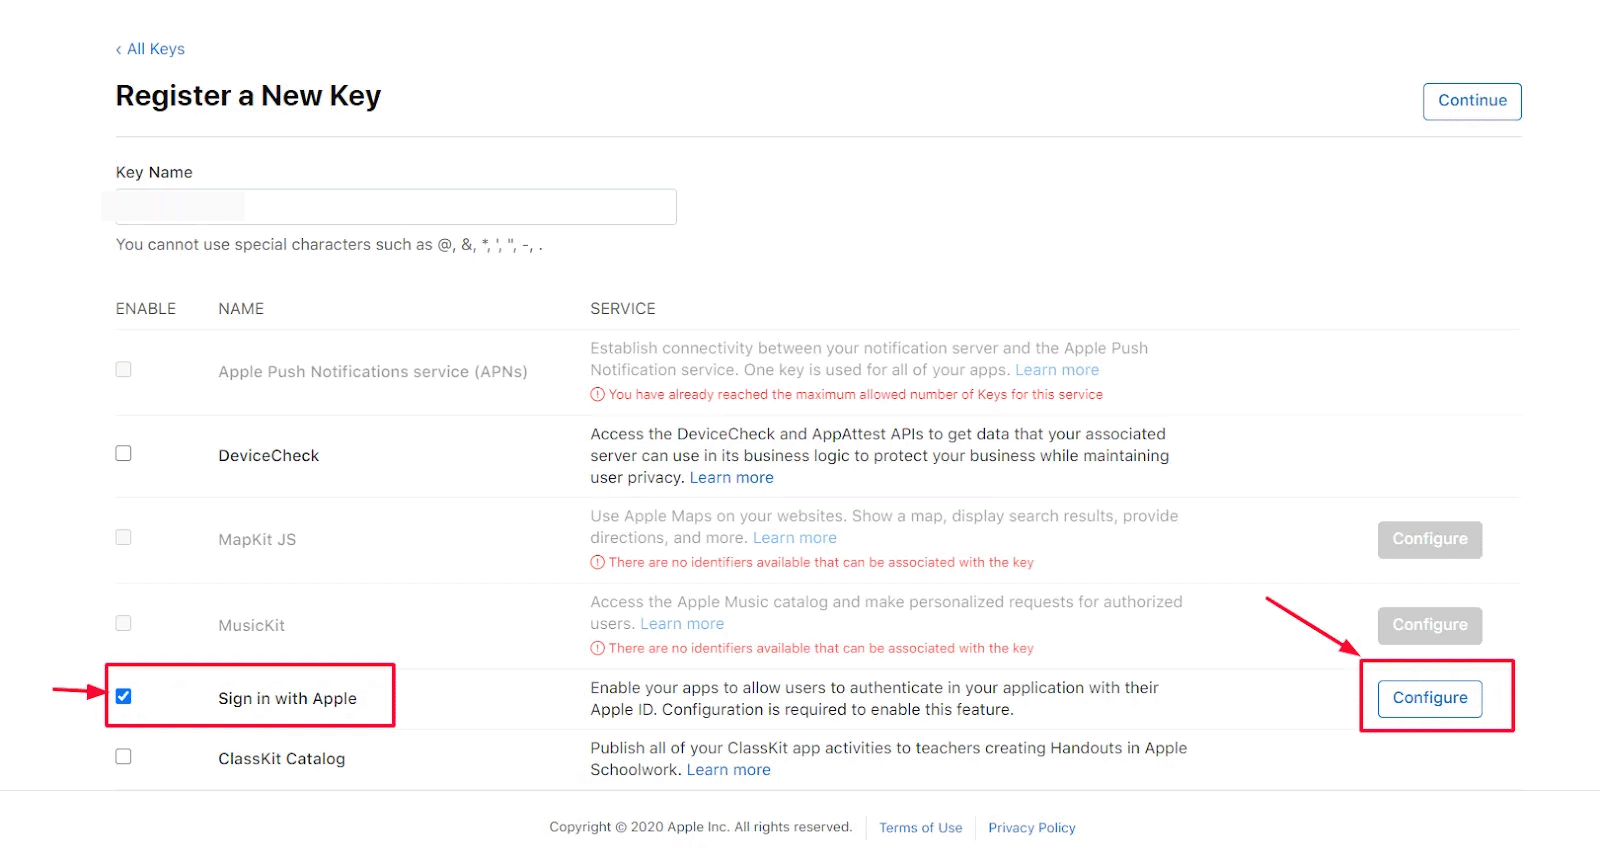
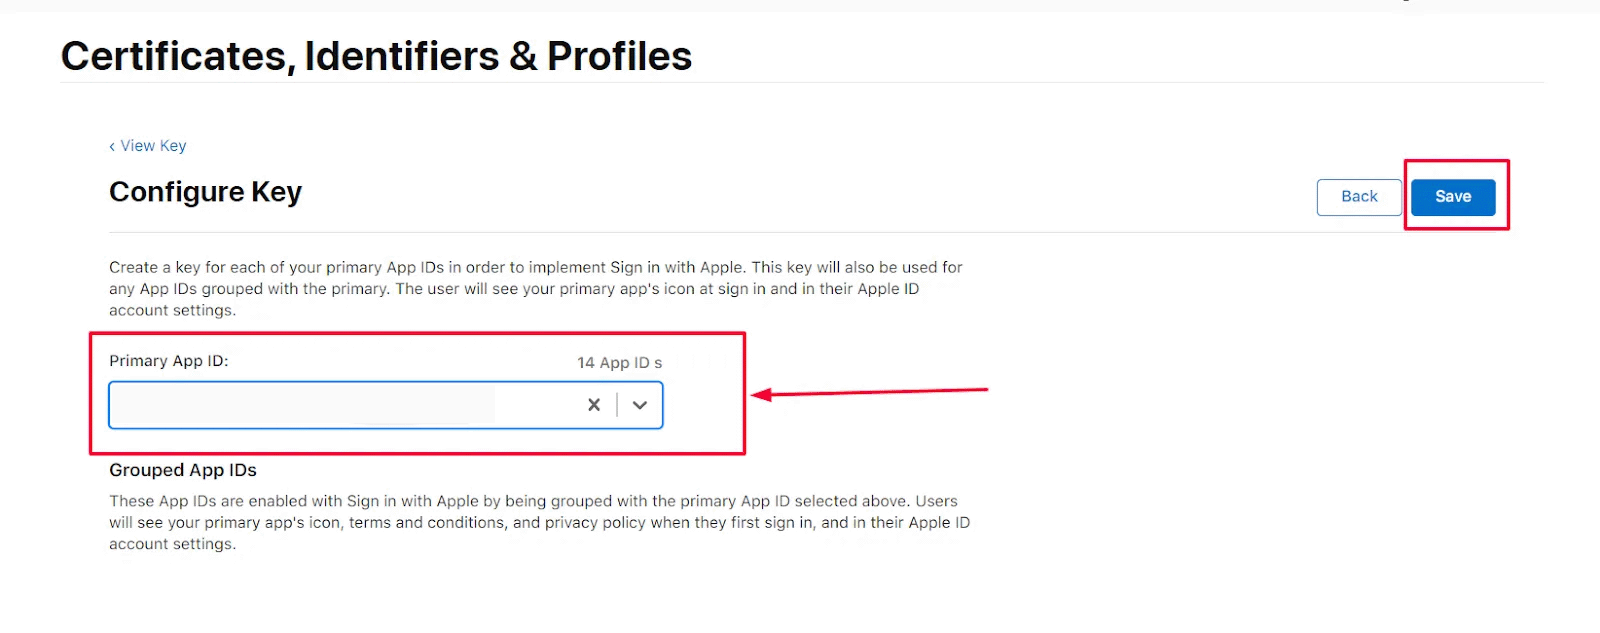
Give your Key a name, and select Sign In with Apple and click on Configure button
Configure Key
Download Your Key
Edit Your Services ID Configuration
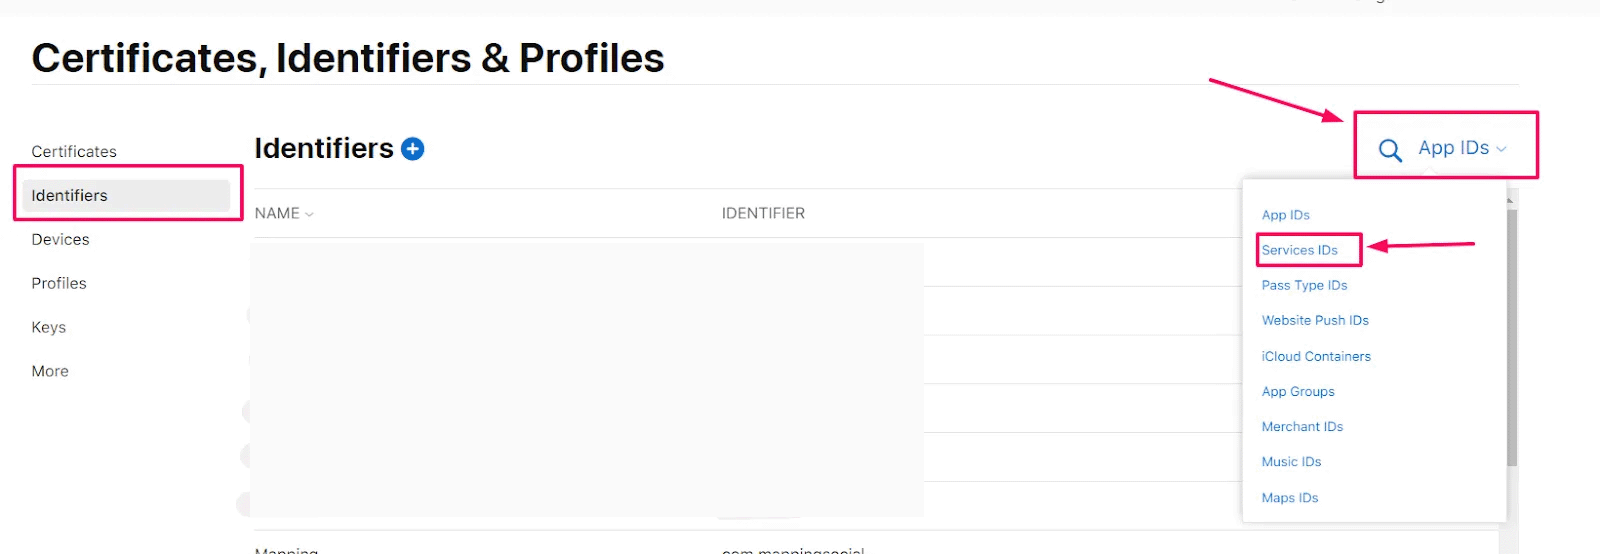
- In the left menu click on Identifiers.
- At the right top click on App IDs
- Select Service IDs from the drop down menu.
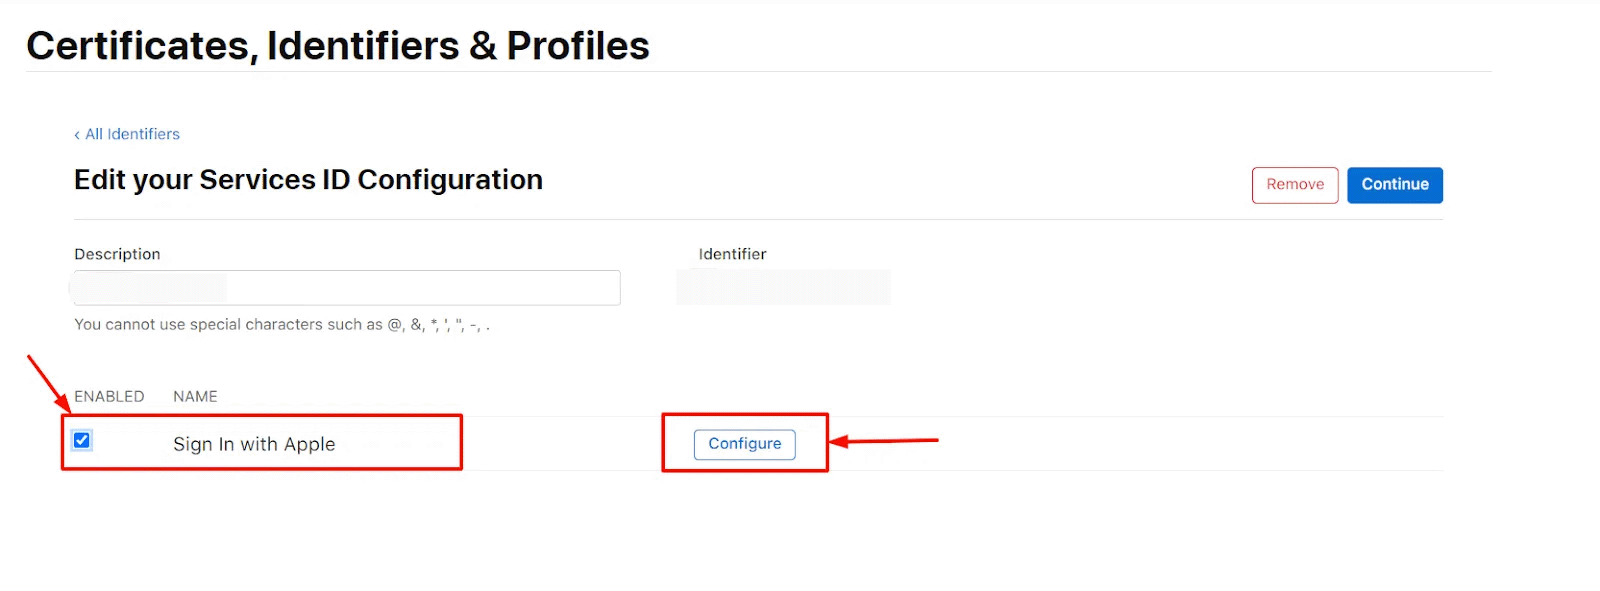
Edit Your Services ID Configuration
- Select your Service Id from the List.
- Select Sign In with Apple and click on Configure button
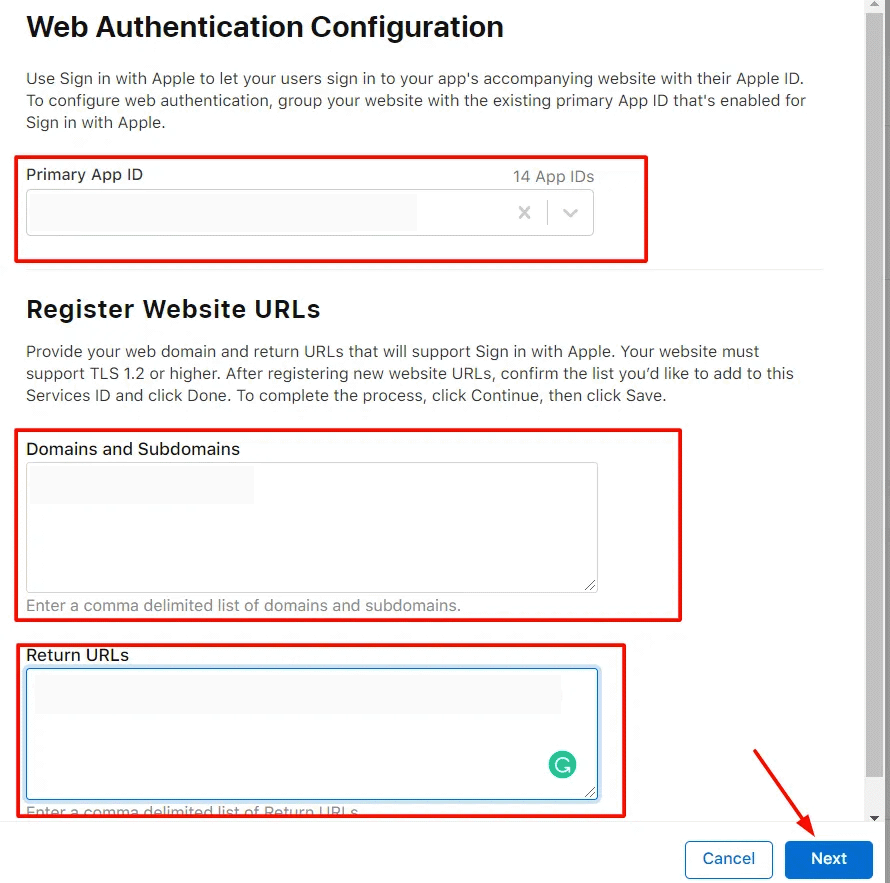
Web Authentication Configuration
Select the Primary App Id from the drop down, and Enter the Domain and Redirect URL in Domains and Subdomains and Return URLs respectively and click on the Next button (You will get the Domain name and Redirect URL from JSON API User Plus Plugin Settings > Apple Connect screen )
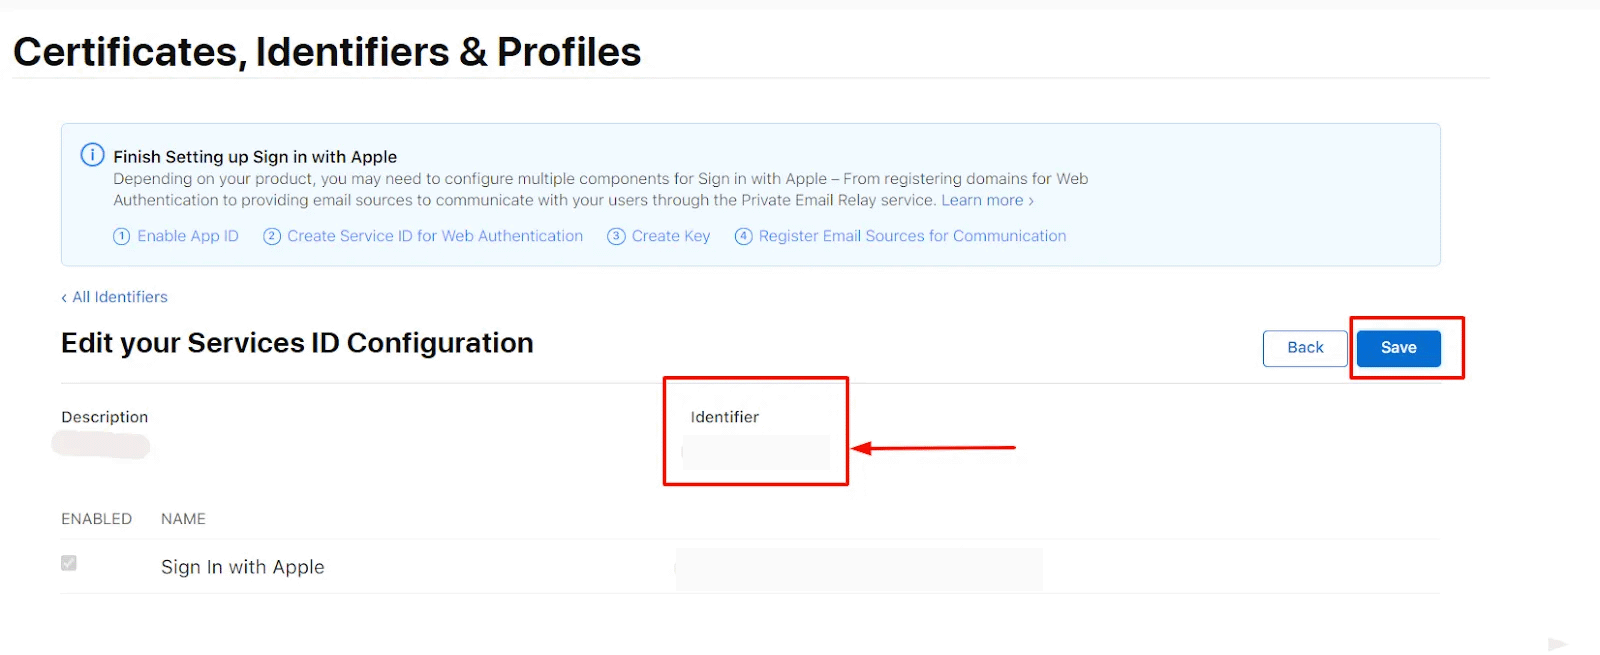
Verify Details & Done
- Verify the details and click on the Done button. After that at the right corner click on the Continue button.
- Copy the Identifier value and click on the Save button.
Now add Client ID, Key ID, Team ID, Redirect URI, Downloaded Private Key in the Apple Connect Settings tab fields. You can test it both with shortcode and Sign in button on Login button as well as by callling the REST API endpoints. Please see the Plugin documentation for endpoints for details.

